- HubPages»
- Arts and Design»
- Crafts & Handiwork»
- Paper Creations
Quilling Basic Shapes - Part I

Basic Quilling Shapes
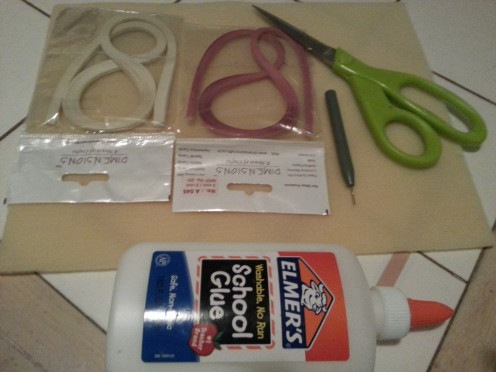
Materials Required
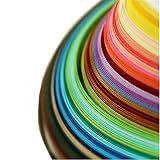
- Quilling paper strips
- Pair of scissors
- Quilling slotted tool
- Glue
- Crimper
- Circle sizer ruler
- Onion Holder
- Tweezers
Many more different tools are available but those mentioned above are the basic tools required for beginner projects. For basic beginner projects only paper strips, slotted tool, scissors and glue are required.
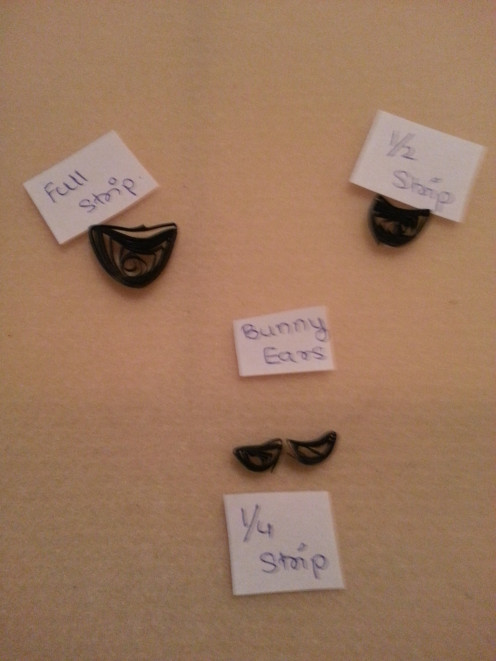
Paper strips vary in thickness. Depending on the project, the thickness of the paper should be varied. It also varies in width - 3mm, 5mm and 10mm.
Introduction
Quilling was popular in England in the 18th century and was taught along with needlework as a hobby for young women. Quilling during those times was known as paper filigree. It is an art of rolling thin strips of paper into coils and shaping these coils into various shapes to create amazing 2D and 3D designs. The art of quilling can only be limited to the quiller's imagination.
In the modern times, the paper filigree has moved onto a new level - from a hobby to a hobby business. Hundreds, maybe thousands of quilling artists have developed a small scale business.
The North American Quilling Guild in USA and the Quilling Guild in UK are working towards preserving this beautiful and intricate art.
Where to find the materials? Cost
Quilling supplies can be found in any of the craft store and quilling kits are also found in many large departmental stores. In-store supplies for quilling is only limited to Hobby Lobby. Amazon and eBay provide a wide range of quilling suppliers from all over the world.
Cost of supplies vary from dealer to dealer. The best way to get cost effective is to browse through online and find best deals. Basic package of 100 strips range from $3.99/- to $5.49/- and more on Amazon and eBay. The price for the slotted tool can range from $1.99/- to $20/-. Getting started with quilling can be as low as $ 10/-
Beginner's Quilling Supplies
Purchasing supplies
Where will you purchase to supplies from?
Getting started - Basic Shapes
As a child needs to learn the basic shapes for a strong foundation, it is really important to master the basic quilling shapes to create amazing projects of your imagination leads you to.
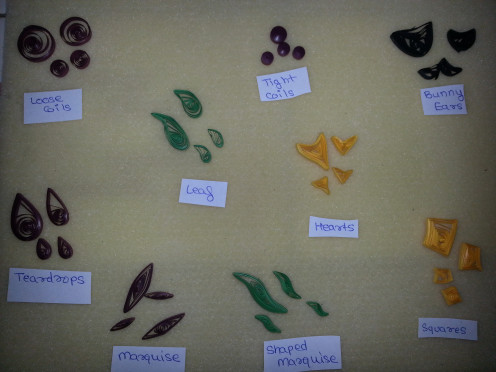
There are many basic shapes. They can be divided into rolls and scrolls. In this article we will be focusing on the shapes created from rolls.
- Tight coil
- Loose coil
- Teardrop
- Marquise
- Shaped Marquise
- Square
- Heart
- Bunny ears
Tight Coils

Tight Coil
- Using the slotted tool, roll a paper strip tightly.
- Do not let go of the coil from the tool once done.
- Glue the end of the coil.
- remove it from the tool.
Return tight coil is ready.
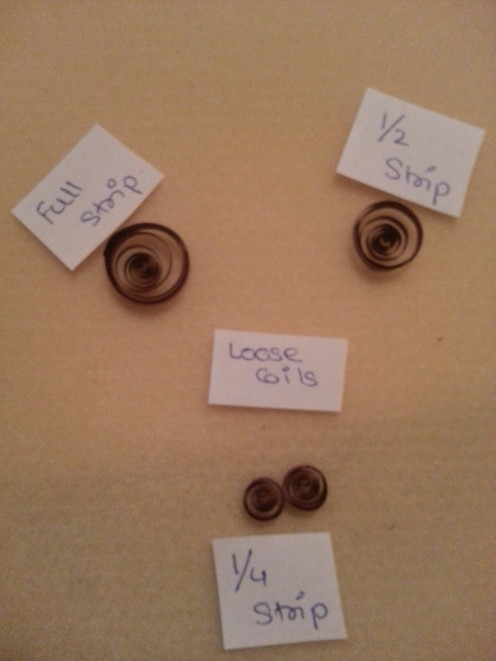
Loose Coil
- Using the slotted tool, roll a strip of paper.
- remove it from the tool and let go of the coil.
- Adjust the coil accordingly to how loose coil is desired.
- Glue the end.
The circle sizer ruler is an easy way to get prefect sized coil if the project requires more than one same sized coil.
Loose Coils
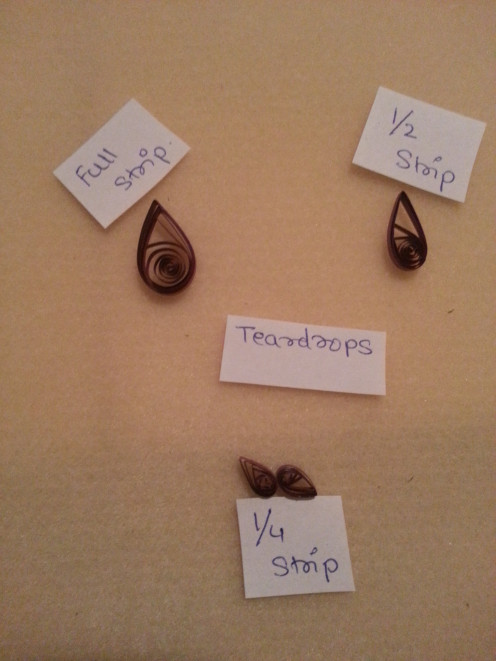
Teardrop
- Make a loose coil.
- Glue the end.
- Pinch one side of the coil to form a teardrop.
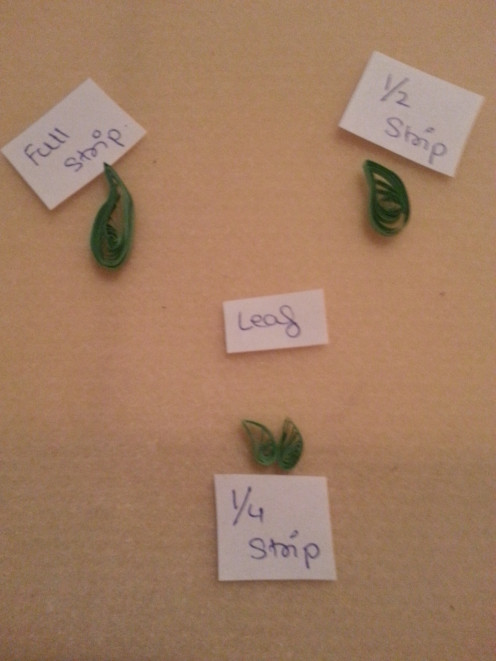
To make a leaf, just bend the pinched tip a little towards one side to give it a leaf shape.
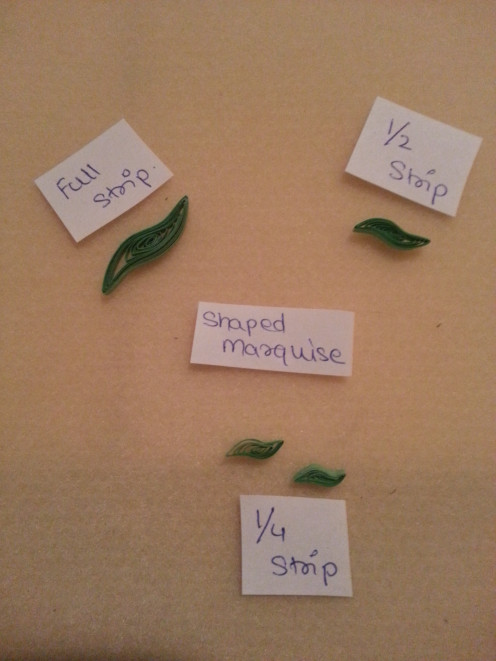
Shaped Marquise
Make a marquise. Curl it's two pinched points in opposite direction.
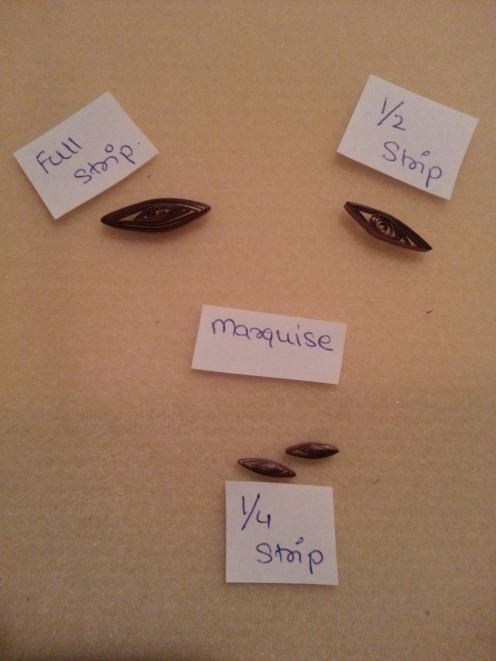
Marquise
- Make a loose coil.
- Glue the end.
- Pinch the coil from both ends to form a marquise.
Teardrop, Leaf, Marquise and Shaped Marquise
Square, Heart and Bunny Ear
Square:
- Make a marquise.
- Flip it 90 degrees and pinch it again on the two opposite sides.
- The four points should be at an equal distance from each other.
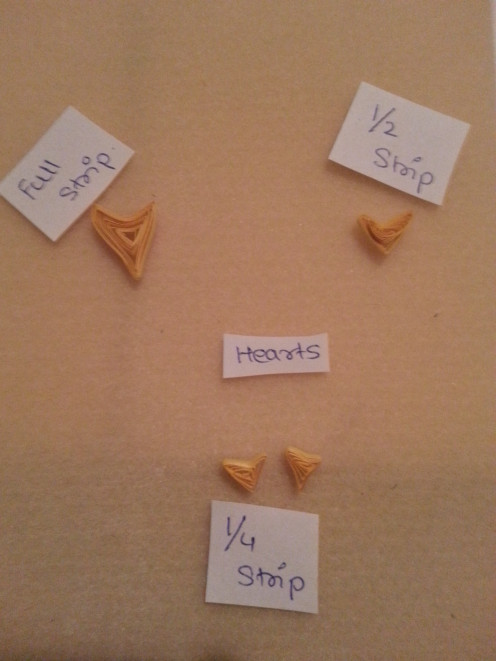
Heart:
- Make a loose coil.
- Glue the end.
- Pinch a point on one side to make a teardrop.
- Make a sharp indent on the opposite side.
Bunny Ear:
- Make a loose coil.
- Glue the end.
- Make a rounded indent with sharp points at the end.
Square, Heart and Bunny Ears

Conclusion
Cutting the paper the strip into smaller pieces will help make delicate and intricate designs. In this section, we covered the basic quilling shapes made from coils. These may not be all that can be made from coils, but it sure is a good start.
In the next article, we will cover the basic shapes made from scrolls and get into learning how to make a fringed flower.
Hope you all enjoyed and learned from this article. For any questions, feel free to message me in the comments below.


")
